

Showing posts with label Food. Show all posts
Showing posts with label Food. Show all posts
Sunday, December 8, 2013
Minecraft Cake
We celebrated my middle child's birthday tonight. He really wanted his favorite dinner (chicken strips, fries, and corn) and a Minecraft cake. So here is what I came up with. I made a cake that is half cake/half brownie and mixed chocolate chips into the whole thing. Green frosting on top makes it into a huge dirt block (with a few Hersheys for depth and "pixels"). The toys are easily available right now from Target/Walmart/etc.

Thursday, January 31, 2013
Destruct-A-Bear
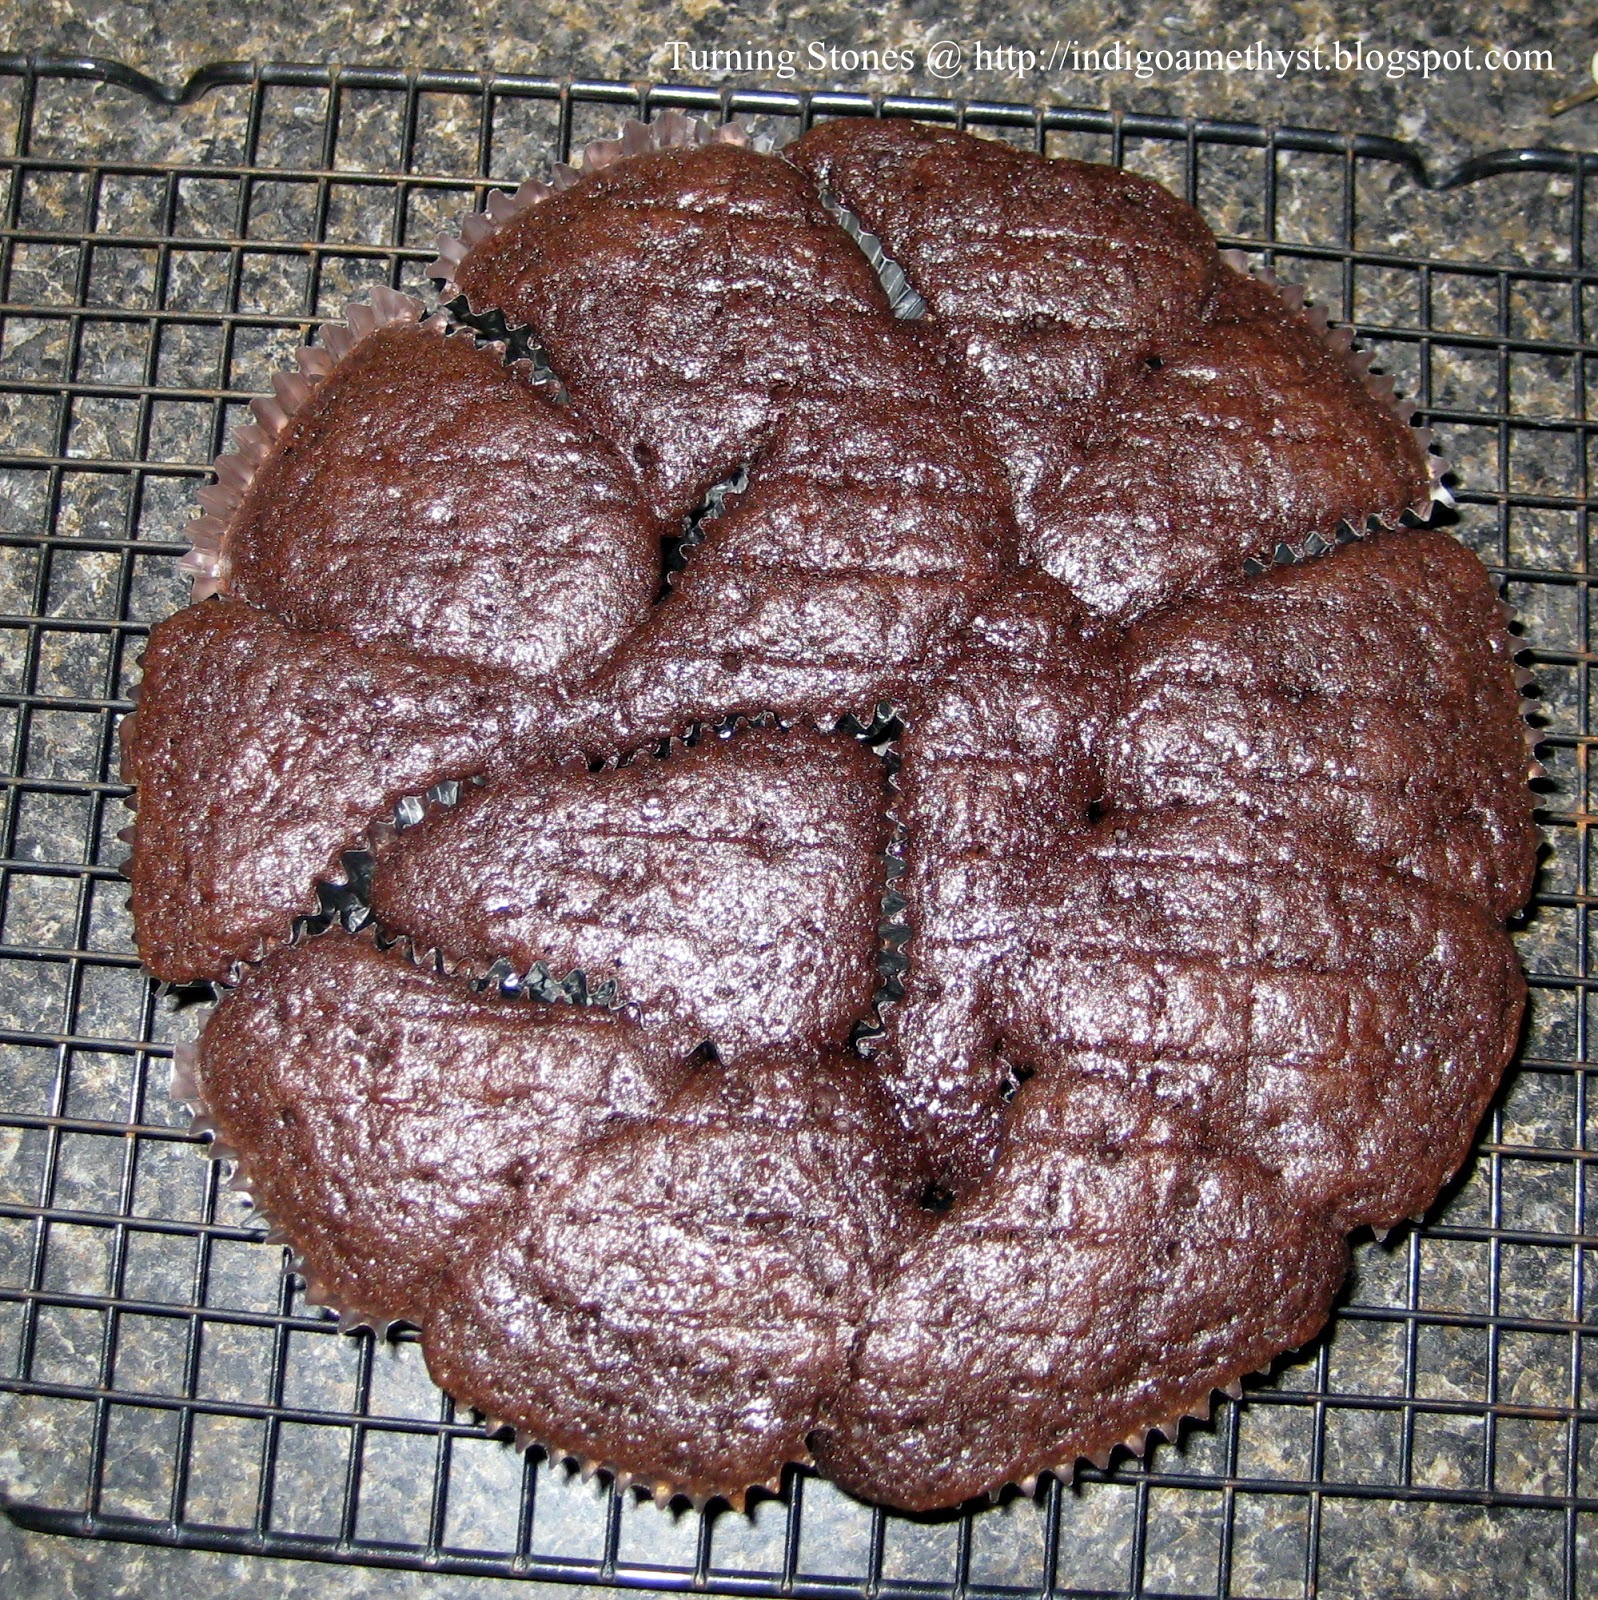
Erin said she wanted to go to Build-A-Bear for her birthday and to go with that she wanted a "Destruct-A-Bear" birthday cake. She wanted to make a bear at the store and pull one apart with a cupcake cake.
I heard a friend talking about putting cupcake papers into a shaped pan to make a cake that was basically precut. She was doing it with a flower shaped tin but said she got the idea from someone else who did it with a round one. I thought that would be a good basis for a pull apart bear and easier to frost than separate cupcakes. I have to admit, it worked better than I thought it would.

I frosted everything in chocolate and just put the white frosting right on top of it. For the nose I used a Starburst cut in half. Then, to make the lines for his mouth I dipped a butter knife into the chocolate frosting and drew with the point of it. Add a couple of eyes from M&Ms and two ears from extra cupcakes and you have yourself a very quick and easy Destruct-A-Bear cake.


I frosted everything in chocolate and just put the white frosting right on top of it. For the nose I used a Starburst cut in half. Then, to make the lines for his mouth I dipped a butter knife into the chocolate frosting and drew with the point of it. Add a couple of eyes from M&Ms and two ears from extra cupcakes and you have yourself a very quick and easy Destruct-A-Bear cake.


Saturday, December 10, 2011
Our Chocolate Wasted Cake
My middle child is having a birthday and this year he wanted a chocolate cake. On Pinterest I came across this Chocolate Wasted Cake and I knew he would love it! (minus the alcohol, of course, as he's only 9). My pictures (below) do not do full justice to her cake and you should check out the original. Also, hers has a tasty twist if you are making it for adults only.

For the chocolate drizzle on mine I melted chocolate chips in a double boiler and used some Torani Almond (Orgeat) syrup to thin it enough for drizzling. If you do it the same way, be careful not to use to much drizzle, as the Almond syrup has a really strong flavor. I was thinking that using peanut butter could be really tasty, too, and would be a little more subtle.

Can't wait to try it!

Thursday, October 27, 2011
Baking Fail
Day 27/31:
I swear, sometimes the only way I get through the day is because of this corner of the kitchen. Sometimes I think my dear coffee will get me through anything.

Tomorrow the kids have their Halloween parties so today we were making sure costumes are ready and cookies and cupcakes are done. Well, they are now done but it's also 1am. I thought I would make cupcakes in ice cream cones for Erin's classroom as it's a classic dessert that's a little fun. But as I took the last batch of the boys' cookies from the oven I apparently turned the oven OFF without noticing. So the tops of the cupcakes cooked but not the middle. I noticed this and turned the oven on hoping that it would still be okay. But the middle of the cupcakes collapsed like a souffle and settled into a chewy mess at the bottom. When I tried to frost the cupcakes (thinking that maybe I could salvage them somehow?) the tops collapsed into the vacant hole and it all just looks like crap.

Think they look vaguely okay from the distance? Well how about a close up. Yeah, not so appetizing. On the other hand, a bunch of 2nd graders are usually not picky about sugar so for a brief moment I considered giving it to them anyway. So I decided to try one and see if they tasted edible, given that they already had a big strike against them in the looks department. WOW, that was gross. Chewy, nasty, nasty. Aaaand... Garbage. So at about 10:30 I headed to the store and got some more cones. I almost gave up here and bought the cupcakes pre-made from the store but I had already sold Erin on the idea of ice cream cone cupcakes and I didn't want to disappoint her.

This time (REALLY important tip here) I made sure that the oven was ON. I know, who would have thought? Anyway, this worked out much better than last time. The kids might even eat these.

Now with some fake dirt (Oreos) and some worms they are disgusting in a good Halloween-ish way instead of a OMFSM-what-is-this-disgusting-thing-get-it-out-of-my-mouth-before-I-puke-ish way. So yeah, the kids will be thrilled and I am finally going to bed. Yay!

Friday, June 3, 2011
How To: Cake and Cupcake Stand
First off I LOVE pinterest. I was resisting because I didn't want to transfer my massive idea folder that I already have but now that I have started I just love it. I have part of my idea folder up there now and slowly I'll get the rest up. No more will I have to transfer my idea folder between computers and my backup hard drive as I can just reference it from anywhere and so can any friends who are interested. LOVE!!! Anyway, I mentioned to someone that I could give them the dimensions to make a cupcake tower and then I figured why not just blog it and then I can put more info up on it.
So, this is the cupcake/cake stand I made for my wedding last October. My friend Selena (behind the stand) made all of my cupcakes and my cake and she was wonderful. They turned out so nice! My niece Julia was quite the helper for her as was my niece Brianna (Julia's cousin).

This is what it looked like before I painted it. I put it all together in the garage to check the fit and see if anything needed to be trimmed up at all.

The support pieces are pretty simple. Mostly you cut out some rectangles and notch the centers. When you cut the center notch you cut it slightly wider than your wood (so that even after painting it will slide smoothly) for half the height of the board. As you can see in the picture below most of the supports are 5 inches tall so the notch is about 2.5 inches so it will fit nicely together.
My support pieces are 7 x 5, 11 x 5, 16 x 5, 20 x 2.5. Most pieces are cut from MDF except for the short support (2.5 inch tall). For that I just used a 1x3 I had in the garage in the scrap pile.

When you are ready to assemble the whole thing this is how the supports fit. They just make an X (or + depending on how you look at it) and then the circle is set on top.

Here is what it will look like all put together. The circles I cut are 10, 14, 18 and 21.5 inches. You could probably make a couple more layers (maybe 24 and 28 inches?) but my reception was fairly small so I stopped at 4. The reason I went with 10 inches for the smallest layer is so that a 8" or 9" cake fits nicely on top. After that it's just a matter of sizing for cupcakes so I allowed a little room on either side for the next layer and then went up a little for each of the next.

My edges aren't perfect (after I drew the circles with pencil I cut it out with a jigsaw) so I trimmed the edges with ribbon. If you are going to use ribbon instead of sanding more I recommend that the ribbon be the same width as your board thickness but I didn't think about it and by the time we started gluing it was the morning of the wedding and there wasn't time to go to the store, haha. So my ribbon is a bit too wide.

The nice thing about building it this way is that you don't have to use all of the layers:

The layers can be separated into multiple towers:

And you don't even have to center anything so you really have a lot of flexibility.

When storing you can stack it flat which is what I did for quite a while.

But later I decided that it was more convenient to use a pan rack (this one was picked up at Walmart) to make it easier to get to the layers I wanted. It also takes up less shelf space (slightly) this way.

And to finish it off, how about a couple more action shots:


Project shared at:
Thursday, November 25, 2010
Really Easy Bread Cornucopia

A couple weeks ago Amy at the Idea Room posted about an she idea found for a Bread Cornucopia (originally from Taste of Home).
It looked really simple and I really wanted to give it a try. We're headed over to someone else's house for Thanksgiving and I wanted a nice display for some nuts and grapes for pre-dinner munchies. Now, I took the easy way to do this. They actually made their own dough, let it rise and used that, which would undoubtedly be better. But since I'm managing small children and dog-sitting at the moment I bought some in-a-can breadsticks (I know, shame on me) and used that to wrap around the tinfoil form and it was done in about 10 minutes for two of them.
Want to see how easy this is to make with just some dough and tinfoil? Take a look over at the Idea Room.
I love how it turned out and now I'm thinking maybe there are some uses for this I can do for Christmas. How about making a bread bowl for dip but shape it like a star or snowman using a tinfoil form? Then the veggies can be arranged around the outside of the shape. I think it would be pretty cute. For a snowman it could even have bread dividers in the middle at each snowman "layer" to seperate different kinds of dip.
Mine didn't brown as nicely as Amy's but it still cooked through well.

My cheater dough:

Subscribe to:
Posts (Atom)