Showing posts with label Decorating. Show all posts

Thursday, October 10, 2013

A Hole in the Wall

I have been dying to cut a hole in this wall for YEARS and I finally got the chance.  The front living room is pretty dark and doesn't get a lot of natural light.  By opening up the wall it brightened it up considerably since the great room has several windows.  It's not a supporting wall so that made this project a whole lot simpler.  I started out by "framing" the opening with painters tape so i could visualize and be sure it was the placement I wanted.


The next step was to cut the power in the wall and let the kids go to town with hammers.  They had a blast beating holes all over it.


This was our first glimpse of the new view from the great room to the office and front living room.  The electrical still needed to be moved into the new header and the plugs needed to be moved into their new placements.


This let so much more light into the rest of the house!  We moved 1 plug to either side of the new opening and put the cables above the new header.


I still need to caulk/paint the trim, texture above the door on this side, and touch up paint on the walls and baseboards.


I also need to cut a piece out of our extra vinyl (left over from when the house was built) to patch in the floor.  The plan is to replace the flooring in the great room fairly soon anyway so it doesn't have to be terribly perfect but I'll try to at least match up the pattern.


And here's a quick Before and After.  I love love love the new doorway.  Of course, now I'm totally itching to case the rest of the doorways in the downstairs (4 of them) but next to removing a wall that will seem simple by comparison.


Saturday, February 23, 2013

Cabinets and Counter Tops

With the boys moved in to their rooms we are working on the cabinets on the outside of the wall. I'm pretty happy with how they are turning out so far.


I didn't want to buy expensive countertops for this and even the cheap prefab laminate counters were $100 each and I needed two. Yeah, no thanks. So I built my own counters for about $55 total. Thrifty Decor Chick just did something similar here and I thought I could work that idea in to my project. Because I was putting this on top of 12" cabinets I couldn't use 1x4s only (at 3.5 inches it would only be 10.5 inches total and I needed more like 12.5 inches). I did still want it to look like it was intentional so I didn't want to tack a random 2" piece on the back.  Luckily, it turns out the measurements worked out for 2 1x4s with a 1x6 in the middle which looks way more balanced. In order to hold it all together I put a 1x12 underneath to screw through but since that's only really 11.25 and not 12 it didn't stretch all the way. See the hole there on the back of the bottom?


To fix that I just used a tiny piece of scrap from the 1x4 I had chopped off earlier. I screwed all of the boards up from the bottom into the top boards so there wouldn't be any holes to patch later.


The cabinets on the left were going to have an angular hole to the side of them that will hold a computer switch. We were going to need access to it so we cut a hole under the shelf in the back so we could get a hand or two in when needed. 


I also cut a hole in the back of the cabinet for the power plug but I forgot to take a picture of that part (whoops).  I'm hoping that having it up high under the counter will prevent more things from falling in there but at least it will be easily accessible if they do.


So here is where we are at now. The bases and the cabinets are installed. The counter has been fabricated for about $55 (not including the stain we'll need later).  I will need to stain and paint next week and then I can start work on the shelves to go on top.  


One of my little helpers refused to eat dinner so he got to come hang out and keep me company for a bit. At least we got to have a nice chat while we worked on our tasks.

Monday, October 24, 2011

A Face Full of Bugs

Day 24/31:

This is our entryway as of this morning. I wanted a light that made a bit more of a statement and I found the perfect one at the Habitat for Humanity ReStore for $25. Even better, it was actually brand new!


I bought a recessed light conversion kit so I didn't have to do any major rewiring. You just take out the bulb and the trim there and there is a new piece that goes up that you can wire a light fixture to. One of the steps is "remove the trim from the recessed fixture". It didn't say to duck the mass quantities of bugs that were hanging out in there since this was on a porch light. What you can see in this picture isn't even 1/10th of what awaited me.


Gross! And of course this is about how much hit me in the face (mouth closed, thankfully!) when I pulled it away from the ceiling.


But doesn't this new cover look nice? Ok, kind of boring but you can see that now I have a place to wire the new fixture in after less than 10 minutes of work.


Here's our pretty new light:


And voila! Nice and light and something pretty when you approach the front door. There is more to do out here but this is a pretty good start to it!


Monday, September 26, 2011

Teal and Zebra Chairs


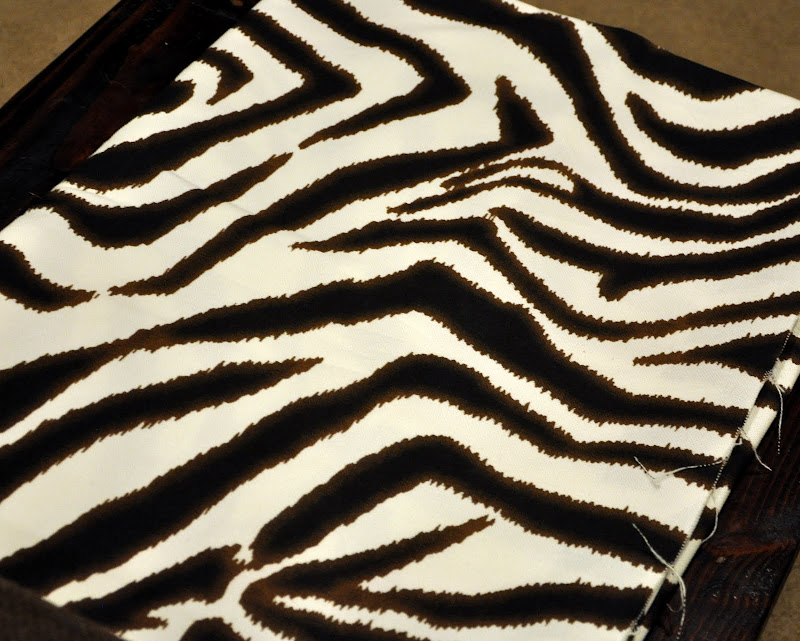
I knew that my living room needed a couple more chairs and when I saw these unloved and filthy little things at the thrift store I knew they would be perfect to fill the space. Then they sat there for a month as I tried to figure out what color to paint them and what fabric to put on the seats. One of the guys at work said I should use a cow patterned fabric like they have on the seats at the corner bar and that jump started my imagination nicely. Sadly there was no cow fabric to be found, though I did find some fun zebra and I like how it worked out. Pulling the seats and backs off of the frames and recovering them was pretty simple but my staple gun has recently turned into an automatic and made that part of the project a little dangerous and living-on-the-wild-side kind of scary.


Husband suggested painting the frames teal to match the DVD shelf in the room and I certainly won't turn him down when he comes up with bright color choices (yay!). So we jumped in to our newly organized garage and got to sanding/painting.


With the color being so bright I think I need to tie it into the rest of that wall a little more so I have some ideas for the storage bins in the IKEA cubbies in order to bring it together a bit.


Now instead of ugly and filthy the chairs are bright and a little fun. My daughter actually squealed when she saw them. I would call that a good endorsement. What that also tells me is that if it becomes too bright for me I know what other room they would have a good home in. :)


How To: Stone Cabinet Pulls/Knobs

When our home was first built I skipped the option of upgrading the knobs on the cabinets and just kept the chrome knobs that were standard. The builder wanted some ridiculous sum of money ($350 ish if I remember right) and I just figured I'd do it later. 3 years later and now I have been looking at options and at $3 a knob, which only affords the plain and kind of ugly cabinet pulls, it would cost me about $120. Yikes!

This is where we started:


Then I saw a link on Pinterest to these and LOVED them. But, they are $75 for 4 of them. So, um, that's $750 for my kitchen. Right, keep looking.


It was at this moment I noticed a jar to my right. It was filled with rocks my grandmother had once collected, I believe from Washington. I had kept them for sentimental reasons after she died since I collect random rocks myself and didn't want them tossed into the flower beds, which is sadly where they were headed. As I looked at them I realized that better than random rocks with no history for a ton of money was rocks for no money with a ton of history.


I started by picking out all the rounded rocks that could make good knobs as there were quite a few that were too oddly shaped for this purpose. Then I started matching them into pairs so each place that two were next to each other would look like they belonged together. I super-glued a flat head screw to the back of the rock and added one nut to go between the rock and the cabinet so it wasn't flush and hard to grab.


One more nut is also needed to hold it on the back side.


I started with these ugly things:


And now we have some knobs that are not only pretty but also have memories. And instead of spending $120+ (or $750!!!) I spent a total of $20 on the screws, nuts, and glue. I did consider using an epoxy that was meant for metal and stone instead of the super glue but I think it wasn't needed. When I attempted to break the screw off of the stone I didn't break the glue, I broke the stone and stronger glue isn't going to change that I can break the stone so I kept it simple.


Now the only thing I'm wondering is if I should seal the rocks or just leave them be? It's possible they might stain if I don't but stones are mostly washable as is so maybe it's fine. What do you think?


Oh, and if you're wondering which type of super glue I use it's Loctite Gel Control. I LOVE that it's not runny and doesn't get all over my hands so it has quickly become my go to glue.

Monday, August 29, 2011

The evolution of our game closet

In our house we have so many board games that there is an entire (full) closet dedicated to them. But really I need that closet for blankets so they have to get out of there. I would have mutiny getting rid of any of them so another solution was in order.

Here is the game closet in all of its original glory (nice, right? haha).


And it got a whole lot worse before it got better...


Much worse... That box on the left has no less than the pieces of 5 different games in there all mixed up. Boo for having to sort.


But after a couple hours of work it now all fits nicely in the hutch. A few of the boxes now contain only the game boards (and which boards are where is labeled on the side of the boxes) and the pieces for the games are in labeled zip lock baggies in the drawer. The other game pieces are in jars on display (idea for that from here) in the top.


The kids really like the new solution, mostly because if they can see it they are more likely to remember it's there/play with it. I certainly like to encourage board games over the TV (which I let them watch too much of) so this will hopefully bring some nice changes.


I've added a few more items to the hutch, mostly my elephants and the ugliest cookie jar ever (and I love it SO much! There's a lot of history to that jar).

I still have a few more holes to fill in but this project is certainly starting to look like it actually belongs here. There are still 4 games that are not in this cabinet but I have other plans for those, hopefully to be wrapped up soon.


Any fun organizing projects going on at your house?

Friday, July 29, 2011

I scored on Craigslist

Last night I scored on Craigslist. I know that sentence sounds bad but really it was a good thing. Who would sell a solid wood buffet/hutch for $60? It's beautiful and I have a new paint project. That's right, MORE PAINT. Aw, yeah! Luckily I just about have one of my other paint projects done and ready to leave the garage so I have space (hubby will appreciate that). This is the picture from the ad. I need to take a better one but last night it just got put down in the middle of the living room so I haven't gotten one yet.


I have to tell you I was so nervous I wouldn't get it. With a price like that (when all the others were $250+ and not as nice) I figured it would go pretty quick. I called 50 minutes after it was posted and I was already the 5th call BUT he said he was first come/first serve and I was the first to make arrangements. Booyah! (Can you tell I was excited? Haha!).

Anyway, so we made an appt. for 6 but then I was reading Mandi's blog and I got nervous that someone would offer more money because it was definitely worth more. Then the guy's wife got called to go into work and they share a car so it was almost off again. Luckily they said she could come a bit later and my father in law came to help me out. This was great because a)I needed his truck and b)I'm going to meet people I don't know at a storage unit and what if they are sinister people (turns out they were really great people and not crazy people luring me to a storage unit and I was psyching myself out for nothing (as usual) but we'll overlook the "I'm crazy" part). I owe my FIL big time for the help, too.

And now it's home and I'm in love. She's in really good shape, too. There are a few dings here and there to clean up and that's about it. Can't wait to start this one!

Oh, and what perfect timing, too. Mandi is doing a Look What I Found Friday right when I actually found something (normally I would find something 3 days from now when I can't play so the timing is nice). Anyway, go check her out because her blog is awesome and she has great style.

Have you found something fun lately? Anything (find or otherwise) have your stomach all tied up in knots right now?

Random moment: I just noticed that I don't have post tags for Paint or Furniture. That surprises me since I do a lot of both. Huh.

Random moment #2: Why is it that, even though I know how to spell definitely, I always spell it wrong anyway (definetely) and the spell checker has to point that out? Every. Single. Time.

Thursday, June 2, 2011

Before and After: Powder Bathroom

Despite almost constant painting, there are 4 rooms in my home that have still been unpainted. The bathrooms. I've just never been itching to do them. I don't know why, maybe because I've never been inspired or possibly because there is just something about putting my face that close to a toilet, no matter how clean.

In any event, the paint bug bit again and I turned the bathroom into this:


From this (Sorry for the awkward pics but it is really hard to get pictures of a seriously tiny room. I actually took the door off of the hinges for most of these pictures):


Here's one more before shot. I still have no idea why the builder installed a full towel bar in a powder bathroom. Such overkill. The paint in here was truly awful before because, like the rest of the house originally did, it had flat builder paint. Builder paint being different than normal paint because they buy crap paint super cheap that the store who made it won't even sell to the general public. Seriously, the guy at the paint store that the builder paint came from actually sneered at the idea of selling it. This stuff is like chalk and just rubs right off the wall if you try to scrub at all. I can't tell you how well that works in a bathroom with 5 kids.


To set off the gray a little more I changed out the owls to a white felt background.


(Remember those?)


The paint color is Sherwin Williams Pewter Cast (though I had it mixed in Behr paint).


I really love how it brings out the colors in the floor. So much better than before.


And the white sink and toilet stand out, too, which I like. I'd still like to chuck the builder light fixture but for now it will do since leaving it made this redo super cheap. Like $35 dollars total cheap. Yay!