Saturday, April 30, 2011

Once upon a house...


Once upon a time, a daddy built his girls a dollhouse. It was a very nice dollhouse, solidly built, with 8 rooms and a staircase. It had a front door and a garage door and a nice little patio. The house was lovingly painted in bright colors left over from building the real house.

The dollhouse was played with often and was very happy.


Years went by as the 3 girls grew. 2 more girls were added and all 5 of them had played with this house. The girls painted the house new colors. Some of the floors started to give way but were temporarily replaced with cardboard. They painted it again. And again. The garage door became stuck with layers of paint. The front door was lost and a replacement was stapled in place. Part of the roof came off, and only a hinge was left to remember where it had once been. It was painted again.


More years went by and all of the girls were grown and gone. The house was moved to a storage area and forgotten. For several years the rains came and often soaked things not well protected in storage and the wood of the house swelled with water. It remained there for some time, lonely and forgotten.

Then one day the daddy was cleaning some things from storage and recalled that there was this house on the back porch. He offered it to one of his girls, who snatched it right up.


She took the dollhouse home with fond memories of playtimes past. The poor waterlogged thing was in a very sorry state indeed. Not really knowing how to work with wood or do many things handy she asked the hardware store and they sold her some paint stripper and a scraper. The paint stripper was poured on and she got to work taking away the gum it made but the poor little house wasn't looking much better. All of the water had done a lot of damage and she felt overwhelmed trying to fix it.

So the poor little house went back into the garage and there it stayed again. For 13 years the girl took the house with her everytime she moved. And every time, the house was stuck in some corner of a garage and forgotten again.


The girls had girls of their own but instead of the old fixer upper their dolls recieved move-in ready houses. The dollhouse was again forgotten and sad.


And then, one day, after those 13 long years since someone tried to last fix the house, the girl realized that she now knew a little about how to work with wood and tools. She now had some knowledge of paint. And she pulled the poor little dollhouse out and gave it another go.

Today we began sanding and I think maybe she can be saved. A little sandpaper, a little wood filler and a lot of elbow grease will be needed. But I think we can do it.


Erin said she likes the paint job after the sanding and would like to keep it that way. I think we need to paint it again but that blue if kinda pretty...

Thursday, April 28, 2011

New headboards

Little by little I am working on getting the boys' room together. Joe wants a red white and blue bedroom and the headboards were the first project for me to get it all kicked off. Next I need to get a couple gallons of Navy blue paint up but that will take a bit of time. :) Originally I intended to paint the headboards with a few more coats of paint, but the knots showing through is kind of cute. Would you fill it in? I keep going back and forth...


I used the free plans for the reclaimed headboard from Ana White, though I modified my legs to be a little shorter.


This only took about 4 hours to cut the wood and build TWO headboards (one for each boy) and a little more to paint. I had some wood already in the garage but I think would have had to spend about $25 total if I had bought it all. If I were to do it again I would have sanded the boards that go across the back on the edges before I put 'em together because I had to use a chisel to separate them a bit. Otherwise they were too flat up against each other.

Below is one of my upcoming projects. I have removed the drawers that are falling out and I'm going to repaint it. It's for work (think 'cubicle farm' in battleship gray) so I am tempted to just paint it chocolate brown to blend in but I kind of want to go light and bright, too. Teal? Decisions, decisions. What color would you paint it (keeping in mind that it's going to my workplace)? I'd love to hear your thoughts on it.

Tuesday, April 26, 2011

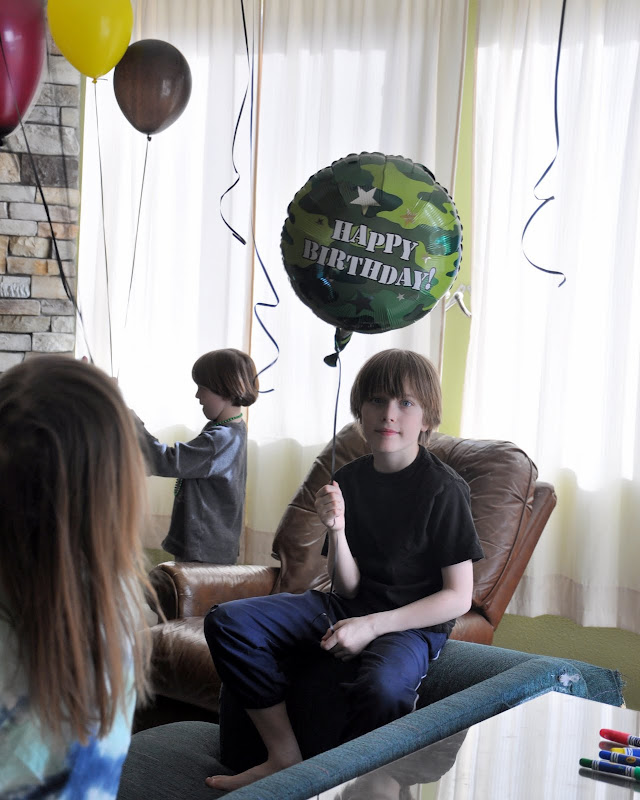
Army Birthday ~ 10 years!

I took Joe in today to see the eye doctor. There is a very good chance that he is going to be getting some glasses soon. He's a little worried but since it's mostly only for reading he thinks he can live with it, hehe.

Since I am catching up with birthday parties, his is next in line. He opted for a at-home party with just family and thought he might like another army theme party (which I did last year too. that post is here).


I got the idea for the army tank cake from this site. I can't find the actual picture that I used but I'm sure it was from that site. The original had used black licorice to make wheel treads but, as cute as it looked, I couldn't get past the smell. :(


In a more recent tradition I have started buying 2 dozen balloons for each child on their birthday. I asked that these be in camo-appropriate colors. Joe was quite excited but then he let the other kids take all but his camo balloon.


We played pin the target on the monster.


Joe really liked his cake (big sigh of relief from mom).


Especially since it was camouflage on the inside too.


I think the presents were acceptable too, lol.

Thursday, April 21, 2011

Create your own (kid) cake. Mmmm


I realized today that a few of the kids' birthday parties were not yet shared here so I'll try to catch some of that up. This particular birthday party was in December so you'll see a few shots of the Christmas ornaments hanging from my light fixture (whoops).

I try to come up with parties to match each child's personality, and Glenn is an artistic boy. So for his 8th birthday we had a "decorate your own cake" party. I made mini bundt cakes for each child and pre-frosted them and then covered the table with bowls of bulk candy and spoons so they could decorate however their hearts desired. I bought way too much candy but it was useful as treats for weeks after so that's ok.


Some candy never actually made it onto the cakes (and they thought they were sneaky, hehe) but that's ok. None of the kids actually ate the entire thing anyway and we saved leftovers.


The girls were the last to leave the table. They wanted to be sure their cakes were just right. I snapped this in between protests of "not yet! I want to finish it first!" as they scrambled to finish before I took pictures. I tried to tell them that the in process pictures are just as much fun.


But they did insist on pictures of their finished masterpieces, too.


This is the birthday boy. He looks pretty pleased with his creation.


Quick party to put together and the kids' loved it. (I liked the easy clean up, too, hehe).

Wednesday, April 20, 2011

Volo


I follow Jody Bergsma on Facebook. She is a watercolor artist whose work has been in every home I've lived in, well, ever (before I was old enough to remember). Her work was always in my mother's home and it is in my home now (and my sister's). Recently someone posted a quote to her Facebook page and I loved it. I knew I wanted it in my house somewhere and that night I started this project on a whim.

When you come to the edge of all the light you have,
And must take a step into the darkness of the unknown,
Believe that one of two things will happen:

Either there will be something solid for you to stand on,
Or you will be taught how to fly.


That alone I thought would be beautiful but then I remembered the state motto of Oregon, which I have long been in love with (not just because I grew up there), of Alis Volat Propriis, meaning She flies with her own wings. If ever I were to get a tattoo (and I'm still not sure if I have the nerve) that phrase is what I would use. So, to the quote above I added Volo which means I fly (and apparently also I wish).


I had several leftover 2x2s in my garage and some canvas drop cloth from one of my painting projects so I thought maybe I would try my hand at making my own amateur canvas. I just cut up and screwed together the 2x2s and then stapled the canvas on.


Combining several blues and greens I had in the paint box gave me a good background. I painted the entire thing navy blue to start and then randomly squished the other colors all over the canvas, brushing them back and forth and mixing them a bit to blend them in. The kids thought that part was pretty funny (and that mommy is crazy, which they may be right about).


And this is what I ended up with:


I started laying out the words to kind of match the Word document I worked out.


On a whim I added a little bird to the end of the quote and added a few coats of Poly to keep it nice. Now this is hanging in my entryway and is one of the first things you see when entering the house.

What has recently inspired you to start a project on a whim?


I linked this post too:
Be Different Act Normal


And I heart naptimePhotobucket

Tuesday, April 19, 2011

American Flag

Joe wants a red, white and blue bedroom and he wants a flag in there somewhere. The headboards are built, hopefully I'll get the room painted this week and the new curtains will be another quick project. But I still needed a flag. I have a frame I bought at Target awhile back that will hold multiple layers of photos so the whole thing isn't just flat. While looking at it I remembered the flag project and decided to put em together. How about the blue and red layers on top and the white floating in back?

Of course, since I'm a little obsessed with the Silhouette at the moment, I had to get that out. I wanted a simple star but the designs that came with it, I thought, didn't have one simple enough. I looked in the shop but didn't find one. Then, while looking at the star that did come with the machine I realized that I can break it apart and just use the piece I wanted. So I did that and then replicated it 49 more times.


Since a friend was asking what the Silhouette is I thought I could show it here. This lovely machine punched out all of my stars for me and now all I have to do is peel them off.


And I'm left with this:


I cut the blue sheet down and cut some strips of red for the flag from a full size sheet. Then I laid them out on a white paper to check the fit.


And now it's all in the two layer glass. I wish this glass didn't reflect so badly but I've been trying to get a good shot of it for a week. :( Can you tell that the white is on a separate layer behind everything else? Now, I do have one question. Do you think the white paper should be bigger than the rest to emphasize it? Or should I leave it the same size as the rest? Oh, and the wood behind the picture is a little bit of the new headboards. More on that later.


Photobucket

Sunday, April 17, 2011

Training! Ha!


This is not my photo.

But it is a very familiar site. Our puppy is about 11 months old now and she is a little stinker who *really* likes DVD cases. And the kids' toys... And the garbage... And whatever was on the stove... And the couch...

Twice we have come home to find she turned on the gas at some point during the day and our entire home was filled with the smell of gas. Yuck.

We are picking up a dog from my sister soon and I hope having another younger dog around the house will mellow her out a little. I hope.

Friday, April 15, 2011

Sun of all my mornings


Anyone remember when I put the reeds on my bedroom wall? Well when I put that up I figured I could put a picture above the bed to cover that big seam. I bought a big white canvas and hung it up there to check the fit and then, well, left it there still in the plastic it came wrapped in for months. I was afraid. I have never painted on canvas. I've never painted on anything that big. And I had *zero* idea what I wanted to put up there anyway.


After months and months of worry I finally decided to just jump in already. Whatever I came up with probably wouldn't be worse than plastic wrapped and blank, right? I put down that first bit of red and kinda freaked. It was so bright and against the white it was shocking for a minute.


See? So different. But I've started and really I have no choice now so let's continue.


Yes, that is a lot of red. I was getting kinda happy with it now though. I originally intended to do a few layers to make it more solid but after the first layer I decided I like the variation better and left it there.


I cut out all the words I wanted using the Silhouette and lay them out on the canvas.


I taped some thread down on the sides to give myself a guide for straight and level lines.


I got the first row down fully prepared to still scrap the whole project and then breathed a huge sigh of relief when it worked.


And now there is something to cover most of that big seam and I wish I hadn't waited so long. After this project I jumped in with canvas. I have painted 3 more store bought canvases (even bigger!) for my living room (almost done with those) and one I made of 2x2s and drop cloth for near the front door. That one really made the kids look at me sideways and think I was crazy squishing paint all over. I'll try to show you that one tomorrow.